
- January 28, 2024
- by Shahriar Kabir
How to Add a “Download All Images” Button to Shopify Product Pages
In this tutorial, we’ll guide you through adding a “Download All Images” button to the product pages of your Shopify store. This feature is particularly useful for stores where customers might benefit from downloading high-quality images of products. We’ll be using the Dawn theme as our example, but the process should be similar for other Shopify themes.
If you prefer video tutorials over text, feel free to skip this post and watch the video below. If not, please continue reading.
 Join Our Free Shopify Support Group
Prerequisites
- Basic understanding of HTML and Liquid (Shopify’s templating language).
- Access to your Shopify theme’s code.
Step 1: Modify the Product Template
First, you need to edit your product template file. This tutorial assumes you’re using the Dawn theme, but the process is comparable for other themes.
- In your Shopify admin, go to ‘Online Store’ > ‘Themes’.
- Find your theme, click ‘Actions’, and then ‘Edit code’.
- Open the
main-product.liquidfile under the ‘Sections’ folder.
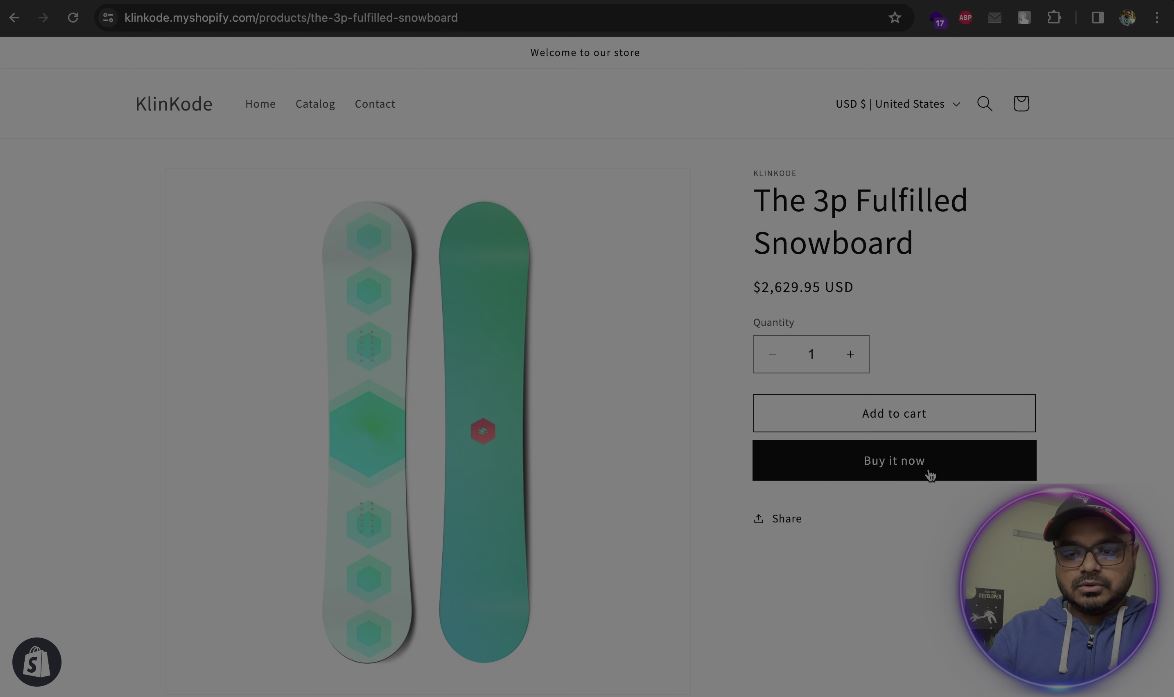
Step 2: Add the Download Button
Place the download button HTML right after the product description field in the main-product.liquid file or on any place you want to add the button. Here’s the download button html code:
<button id="download-images">Download All Images</button>This will add a button labeled “Download All Images” below the product description.
Step 3: Add Styling
To ensure the button looks good, add the following CSS to your theme’s CSS file. In the case of the Dawn theme, add this to the base.css file located in the ‘Assets’ folder:
#download-images {
  background-color: #007bff;
  color: white;
  padding: 10px 20px;
  border: none;
  border-radius: 5px;
  font-size: 16px;
  cursor: pointer;
  transition: background-color 0.3s ease;
  text-decoration: none;
  display: inline-block;
  margin: 10px 0;
}

#download-images:hover {
  background-color: #0056b3;
}
This CSS will style the button to have a modern and sleek appearance.
Step 4: Add the JavaScript
Next, insert the following JavaScript at the bottom of your main-product.liquid file:
<script>
document.getElementById('download-images').addEventListener('click', function() {
  document.querySelectorAll('.product__media img').forEach(function(img, index) {
    setTimeout(function() {
      var url = img.src.split('?')[0];
      var a = document.createElement('a');
      a.href = url;
      a.download = 'product-image-' + index + '.' + url.split('.').pop();
      document.body.appendChild(a);
      a.click();
      document.body.removeChild(a);
    }, index * 1000);
  });
});
</script>
Breaking Down the JavaScript
- Event Listener: The script waits for a click on the button with the ID
download-images. - Select and Iterate: It selects all
<img>tags inside elements with the classproduct__media, which typically contains the product images. - Download Each Image: For each image, it creates an ‘a’ (anchor) element programmatically, sets its ‘href’ to the image’s URL, and triggers a click event to start the download.
- Delay: There’s a slight delay (
index * 1000milliseconds) between downloads to prevent the browser’s popup blocker from interfering.
Conclusion
That’s it! You now have a functional “Download All Images” button on your Shopify product pages. This feature enhances the customer experience, especially in stores where high-resolution images are a key part of the shopping experience.
Remember, while this guide uses the Dawn theme as an example, the general process should work with minor tweaks on other Shopify themes. Always test changes on a development or backup version of your theme to avoid disrupting your live store.
Have you tried this customization? How did it work for your store? Let us know in the comments below!
